Reclaimed Wood Walls

Some 400' of cedar fencing encloses our back yard on three sides. The fence boards have weathered to a nice silvery gray, but the fence itself was hastily built by the previous owners and doesn't function all that well. I decided to reclaim a portion of it to trim out a couple walls in the new apartment. Who can turn down free wall board?
I removed ~90 boards and cut them down to 5 feet on the miter saw. I painted the foam walls a dark color (gray-blue), snapped some layout lines, and used gray 2-1/2" trim-head star drive #10 deck screws to fasten the boards to the "studs" in the Fox Blocks. A long level helped to keep things running true. Screws will make things easier when it comes time to run the electrical. I didn't thickness plane the boards, straighten their edges, or sand their faces, as some people do. They were plenty flat and straight for a project like this. I hit the entire surface with wire brush to get rid of some of the roughness and clean off small patchs of lichen. Imperfections will disappear under a coat of water based polyurethane.

I left the base and crown off until the flooring goes down and I make a decision about what to do with the ceiling. The base trim will be simple 1-1/8" x 5-1/2" boards. The crown will be narrower, but with the same square profile. The trim will be painted white. The walls (living room) should look pretty sharp when the trim work is complete. The camera lens distorts the dimensions in this photo; that pass-through window is 48" x 16" (the size of one Fox Block) and 5 feet off the floor. I will leave the pass-through trim, fastened with finish nails not screws, the way it is here and paint the inside surfaces some bright color; it will function as a shelf for my garden gnome collection.

The ICF walls have a lot of mass to them - 13" thick. I wrapped the wood around the doorway corner, which I think looks great. I toyed with the idea of alternating the overlaps at the corners (weaving the corners), but the foam on the end walls was rough. I kept things simple by overlapping the long boards with the short ones and attaching with 2" brads from the finish gun.

The walls on either side of the 48" wide doorway are 9'10" long x 8'0" high. I'll install a non-structural wooden beam over the doorway, maybe wrapping it over the wall boards a bit. I will also go back with some touch up paint and hit any gaps that show between boards (I forgot to paint a portion of one wall).

Continued around the other side. Total cost: $125 for screws, finish nails, and polyurethane. I had most of this stuff lying around so it was considerably cheaper.

Left over scraps will make great kindling.

Here's the ugly gap remaining after the first set of boards were removed. I'll take down the remaining posts with the chainsaw soon - give the moose a direct path to Hilary's raspberries.

Removing the remaining fence boards.


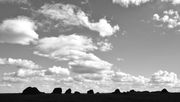
First snow on the peaks. Like Laramie, snow in late September is the norm.


The ice gully, fully thawed.

Driving back from the lumber yard, I came across our local wolverine. He loped along in front of me for a couple hundred yards, weaving into the ditch, out onto the road, and back into the woods. Dark black, probably a youngster, very light on his feet, moved fast with little effort. Very cool to see him. Someone else put this sign up at the bulletin board the following day.

Moose Boy rides on.

Jim's roof is nearly done.